Deploying Clojure Like a Seasoned Hobbyist
Clojure on DigitalOcean
Software engineer @ Metosin Ltd Need help with a project, contact: first.last@metosin.com As a 𝐜𝐨𝐧𝐬𝐮𝐥𝐭𝐚𝐧𝐭, I help clients find technical solutions to their business problems and facilitate communication between the stakeholders and the technical team. As a 𝐟𝐮𝐥𝐥-𝐬𝐭𝐚𝐜𝐤 𝐝𝐞𝐯𝐞𝐥𝐨𝐩𝐞𝐫, I build technical solutions for client's problems from user interfaces, and backend services to infrastructure-as-code solutions. As a 𝐦𝐚𝐜𝐡𝐢𝐧𝐞 𝐥𝐞𝐚𝐫𝐧𝐢𝐧𝐠 𝐞𝐧𝐠𝐢𝐧𝐞𝐞𝐫, I create, validate and deploy predictive models.
This is a tutorial on how to set up a minimal Clojure app development environment with Postgres on DigitalOcean using Terraform. Although there will be room for further optimization and improvement in the implementation, this post focuses on providing the most straightforward template for setting up a project.
I prefer configuring deployments in declarative Terraform files over clicking through dashboards. This helps me to get back on track when I return to my abandoned side projects.
It's worth mentioning that I will be using a local terraform state, although I don't recommend it. Lately, I have been using Terraform Cloud for my projects. If you want to learn how to set up a Github CI with Terraform Cloud for this project, please let me know in the comments.
Most platforms like AWS, GCP, Azure, Linode, Fly, and Digitalocean support Terraform. The big three, AWS, GCP, and Azure, feel excessive for hobby projects. Additionally, managing virtual servers or utilizing Kubernetes is not something I want to deal with, so that crosses Linode off the list, leaving me with Fly and Digitalocean as the options. While I haven't tested Fly yet, DigitalOcean's app platform has become my go-to choice out of habit and because the development experience feels suitable.
Requirements
We need Terraform, Doctl, Docker, and Docker Compose installed on our development machine and a DigitalOcean account with an API token with write permissions that we can use to authenticate ourselves from the command line.
You should be able to follow up on the examples without prior knowledge of Terraform. Still, if you're interested in learning more, the official website is an excellent place to start.
Application
To get started, create the following folder structure for the project. Clojure-related code and required Docker files are in the api folder, where docker-compose.yml is for running the application locally with a Postgres database, and the DigitalOcean-related Terraform code will be in the terraform folder.
project-root
├── api
│   ├── deps.edn
│   ├── docker-compose.yml
│   ├── Dockerfile
│   └── src
│       └── main.clj
└── terraform
    ├── main.tf
    ├── output.tf
    └── setup.tf
Clojure
First, let's start by defining the Clojure dependencies for the application in the api/deps.edn. We need ring dependencies for serving the API and next.jdbc and postgresql for the database access.
{:paths ["src"]

 :deps {org.clojure/clojure {:mvn/version "1.11.0"}
        ring/ring-core {:mvn/version "1.6.3"}
        ring/ring-jetty-adapter {:mvn/version "1.6.3"}
        com.github.seancorfield/next.jdbc {:mvn/version "1.2.659"}
        org.postgresql/postgresql {:mvn/version "42.2.10"}}

 :aliases {:run {:main-opts ["-m" "main"]
                 :exec-fn   main/run!}}}
Next, create the code to serve the API, connect to the database, and make a database query in api/src/main.clj.
(ns main
  (:require [ring.adapter.jetty :as jetty]
            [next.jdbc :as jdbc])
  (:gen-class))

(def port (Integer/parseInt (System/getenv "PORT")))

(def db {:dbtype "postgres"
         :jdbcUrl (System/getenv "JDBC_DATABASE_URL")})

(def ds (jdbc/get-datasource db))

(defn app [_request]
  (let [db-version (jdbc/execute! ds ["SELECT version()"])]
    {:status  200
     :headers {"Content-Type" "application/edn"}
     :body    (str db-version)}))

(defn run! [& _args]
  (jetty/run-jetty #'app {:port port}))
This is all of the application code. The next step is to create a Dockerfile and set up the local development environment to validate that the database connection and the API are working as expected when provided with the expected environment variables.
Dockerfile
Let's keep the api/Dockerfile as simple as possible for now.
FROM clojure:openjdk-17-tools-deps-buster

WORKDIR app
COPY . .

RUN clojure -P

CMD clj -X:run
In general it's better to create the Dockerfile in stages to avoid unnecessary build delay and minimize the image size. If you're interested in learning more about that let me know in the comments. You can also read more Docker: Multi-Stage Builds for further information.
Finally, let's set up a api/docker-compose.yml file for mimicking our deployment environment to test that the API is working as expected.
version: '3.1'

services:

  api:
    build: .
    environment:
      JDBC_DATABASE_URL: "jdbc:postgresql://postgres:5432/db?user=user&password=password"
      PORT: 8000
    ports:
      - 8000:8000

  postgres:
    image: postgres
    environment:
      POSTGRES_DB: db
      POSTGRES_USER: user
      POSTGRES_PASSWORD: password
    ports:
      - 5432:5432
Validate Application Code
Start the API and the database with docker-compose up and HTTP GET localhost:8000.
❯ http localhost:8000
HTTP/1.1 200 OK
Content-Type: application/edn
Date: Mon, 30 Oct 2023 16:50:53 GMT
Server: Jetty(9.2.21.v20170120)
Transfer-Encoding: chunked

[{:version "PostgreSQL 14.2 (Debian 14.2-1.pgdg110+1)
            on x86_64-pc-linux-gnu, compiled by gcc
            (Debian 10.2.1-6) 10.2.1 20210110, 64-bit"}]
If you did get something similar to the above, we are good to continue forward. The next step is to set up the application to run in DigitalOcean.
In the case you're wondering what's the
httpcommand. It is httpie.
DigitalOcean and Terraform
The first thing we must do is to set up the DigitalOcean Terraform provider. This is analogous to adding a Clojure dependency in a deps.edn file. Open terraform/setup.tf and add the following content to it.
terraform {
  required_providers {
    digitalocean = {
      source  = "digitalocean/digitalocean"
      version = "~> 2.0"
    }
  }
}

provider "digitalocean" {}
When a new provider is added, Terraform needs to be explicitly initialized with terraform init. After running the command, you should see the following message with additional output.
Terraform has been successfully initialized!
So far, we have downloaded the provider but have not yet configured the authentication. We'll get there in a moment.
Project
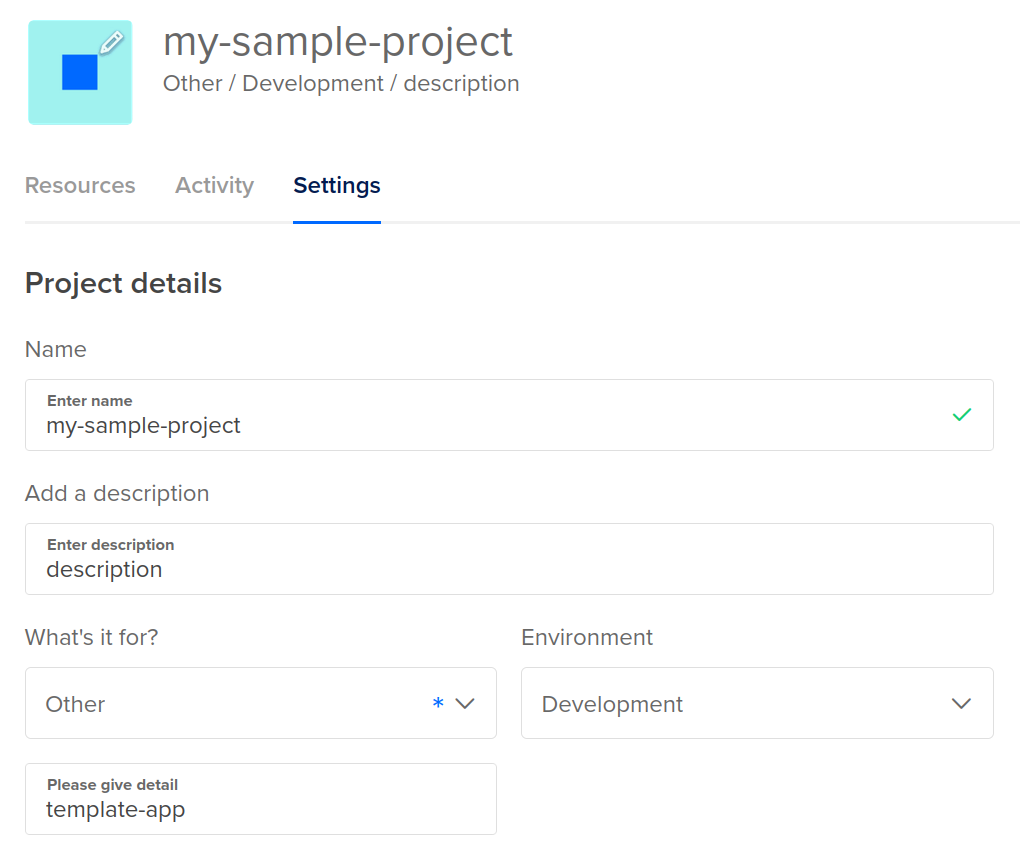
Now it's time to set up the project to which we'll assign all our resources. Add the following content to terraform/main.tf and feel free to name your project however you wish.
resource "digitalocean_project" "project" {
  name        = "my-sample-project"
  description = "description"
  environment = "development"
  purpose     = "template-app"
}
If we try to apply the changes before configuring the API token, we should see something like this:
❯ terraform apply

...

digitalocean_project.project: Creating...
╷
│ Error: Error creating Project: POST https://api.digitalocean.com/v2/projects:
|        401 (request "f2774cfc-66fc-4f34-98d9-0935f9dcd33d")
|        Unable to authenticate you with digitalocean_project.project,
│        on main.tf line 1, in resource "digitalocean_project" "project":
│        1: resource "digitalocean_project" "project" {
│
╵
To apply the changes, we must authenticate ourselves with a token. There are a couple of different options on how to do this.
token- (Required) This is the DO API token. Alternatively, this can also be specified using environment variables ordered by precedence:
I'll do this step by exporting my API token in an environment variable in the terminal.
❯ export DIGITALOCEAN_TOKEN=${YOUR_API_TOKEN}
After this, we should be able to create the project by running terraform apply.
❯ terraform apply

Terraform used the selected providers to generate the following execution plan.
Resource actions are indicated with the following symbols:
  + create

Terraform will perform the following actions:

  # digitalocean_project.project will be created
  + resource "digitalocean_project" "project" {
      + created_at  = (known after apply)
      + description = "description"
      + environment = "development"
      + id          = (known after apply)
      + is_default  = false
      + name        = "my-sample-project"
      + owner_id    = (known after apply)
      + owner_uuid  = (known after apply)
      + purpose     = "template-app"
      + resources   = (known after apply)
      + updated_at  = (known after apply)
    }

Plan: 1 to add, 0 to change, 0 to destroy.

Do you want to perform these actions?
  Terraform will perform the actions described above.
  Only 'yes' will be accepted to approve.

  Enter a value: yes

digitalocean_project.project: Creating...
digitalocean_project.project: Creation complete after 1s [id=22276173-77de-4e41-ab47-fae4a86ec414]

Apply complete! Resources: 1 added, 0 changed, 0 destroyed.
And confirm that the project was created by logging in to the DigitalOcean dashboard.
Container Registry
The next step is to set up the container registry to publish the application image. Add the following to terraform/main.tf.
 resource "digitalocean_container_registry" "app_registry" {
  name                   = "clojure-sample-app"
  subscription_tier_slug = "starter"
}
After applying the configuration, confirm that the registry was created. Let's do it with the doctl command line tool this time around.
❯ doctl registry get clojure-sample-app
Name                  Endpoint                                        Region slug
clojure-sample-app    registry.digitalocean.com/clojure-sample-app    blr1
Here, we need to pick up the endpoint value clojure-sample-app and use that to tag the application image. Add the build section to the api/docker-compose.yml file and run docker-compose build.
services:
  api:
    build:
      context: .
      tags:
        - "registry.digitalocean.com/clojure-sample-app/dev"
    environment:
      JDBC_DATABASE_URL: "jdbc:postgresql://postgres:5432/db?user=user&password=password"
      PORT: 8000
    ports:
      - 8000:8000
After building, confirm that the image exists with the expected name.
❯ docker image ls | grep clojure-sample-app
registry.digitalocean.com/clojure-sample-app/dev   latest 20266c1dfcda   12 seconds ago   715MB
It looks like the build produced the expected outcome. Next, we must log in to the DigitalOcean container registry to publish the Docker image.
❯ doctl registry login
Logging Docker in to registry.digitalocean.com
And then push the image to the registry.
❯ docker push registry.digitalocean.com/clojure-sample-app/dev
...
latest: digest: sha256:d8a5c01cd95ab5c0981c454866ec52203feba529f169e2da93cb6a99f3af5d88 size: 2840
Let's confirm with doctl that the image is available in DigitalOcean.
❯ doctl registry repository list-v2
Name    Latest Manifest                                                            Latest Tag    Tag Count    Manifest Count    Updated At
dev     sha256:d8a5c01cd95ab5c0981c454866ec52203feba529f169e2da93cb6a99f3af5d88    latest        1            1                 2023-11-01 16:07:59 +0000 UTC
At this point, we have created everything required for the app deployment. Let's do that next.
Application
Create a digitalocean_app resource and update the digitalocean_project from before by adding the app to the resources. This way, DigitalOcean can group the resources (in this case, just the app) under the project.
Let's use the least expensive configuration for the dev environment by utilizing a basic-xss instance with a development database. You can modify these based on your needs. See the rest of the available configuration options from the docs.
resource "digitalocean_project" "project" {
  ...
  # Add this line
  resources   = [digitalocean_app.app.urn]
}

resource "digitalocean_app" "app" {
  spec {
    name   = "sample-app"
    region = "ams"

    alert {
      rule = "DEPLOYMENT_FAILED"
    }

    service {
      name               = "api"
      instance_count     = 1
      instance_size_slug = "basic-xxs"

      image {
        registry_type = "DOCR"
        repository    = "dev"
        tag           = "latest"
        deploy_on_push {
          enabled = true
        }
      }

      env {
        key   = "JDBC_DATABASE_URL"
        value = "$${starter-db.JDBC_DATABASE_URL}"
      }

      source_dir = "api/"
      http_port  = 8000

      run_command = "clj -X:run"
    }

    database {
      name       = "starter-db"
      engine     = "PG"
      production = false
    }
  }
}
You probably noticed that we don't have a PORT variable for the application. This is because, in this case, we had configured it. Digitalocean would override it with the http_port variable.

The image block of the configuration ties the container registry we created earlier to the application. After, whenever we push a new image with the dev tag, the application will be redeployed.
Validate
Finally, it's time to check if we did everything correctly. Let's fetch the live URL for our new application. We can do this with doctl apps list.
❯ doctl apps list -o json | jq ".[0].live_url"
"https://sample-app-xeoo8.ondigitalocean.app"
However, I prefer using the resource available attributes via Terraform outputs. These are usually declared in the output.tf file, but I'll skip this step for the example and leave it in terraform/main.tf. Add the following to the file and run terraform apply once more.
output "app_url" {
  value = digitalocean_app.app.live_url
}
Afterwards, the outputs can be viewed with terraform output
❯ terraform output
app_url = "https://sample-app-xeoo8.ondigitalocean.app"
Now, we are ready for the last step. Validate that we get the Postgres version as a result, as we did with the local setup.
❯ http https://sample-app-xeoo8.ondigitalocean.app

HTTP/1.1 200 OK
CF-Cache-Status: MISS
CF-RAY: 81f5801c8898d92e-HEL
Connection: keep-alive
Content-Encoding: br
Content-Type: application/edn
Date: Wed, 01 Nov 2023 16:26:37 GMT
Last-Modified: Wed, 01 Nov 2023 16:26:36 GMT
Server: cloudflare
Set-Cookie: __cf_bm=SHREkz9ddLOs1EoTzuNj7DSPYfazEy_bpdi7y_Kb9BE-1698855996-0-AVgy3TNvUDITYonrci23K+dW1BHozbNCLeNX0FMHMpI3miRJBq8I4HlQE5nMA5YjoZ4dEXLatcef+AE+gjq4xeQ=; path=/; expires=Wed, 01-Nov-23 16:56:36 GMT; domain=.ondigitalocean.app; HttpOnly; Secure; SameSite=None
Transfer-Encoding: chunked
Vary: Accept-Encoding
cache-control: private
x-do-app-origin: 35eedf3b-e0a9-4376-863e-c5ba59ef5d6a
x-do-orig-status: 200

[{:version "PostgreSQL 12.16 on x86_64-pc-linux-gnu,
            compiled by gcc, a 47816671df p 0b9793bd75, 64-bit"}]
Looks like everything is working as expected.
Destroy
If you don't want to keep the application running, remember to destroy all of the created resources with terraform destroy. The expected monthly cost with this setup with the basic-xxs instance size and development database is around $12 per month, but the starter subscription tier of DOCR is free of charge.
You can read more about the pricing models from the DigitalOcean docs: App platform, DOCR pricing.
Conclusion
I think that DigitalOcean is an excellent lightweight alternative for smaller projects. It does have all the expected features for general app development, and it can be extended with the add-ons found in the marketplace. I have not yet used it for long-term projects since my side projects don't last long enough, but so far, I've been happy with it from the tinkerer's perspective. I would rather not spend my leisure coding time dealing with infrastructure.
Once again, thanks for reading, and I hope you found this helpful. Here's the accompanying GitHub repository.